If you have successfully jailbroken your ATV2 and don't know what else to do with it. Here is where the fun begins. Installing NitoTV, much like Cydia on the other idevices, on the jailbroken ATV2 will allow you to get many useful programs such as the XBMC. If you're not familiar with XBMC, please read this HERE.
**Warning! Before going ahead with this tutorial, please be reminded that I am not responsible for anything that may go wrong with your products. Proceed at your own risk**
1A. What you need before you start installing NitoTV on the ATV2:
Computer Windows XP or higher or MAC OSX 10.6 or higher
Will need a micro USB cable.
Download PuTTY
Right click and open it as administrator, it'll look like this.
1B. For 'Host Name (or IP Address)' type in your ATV2 IP Address which can found under the 'Settings' tab. Click on 'General' will get you to the next screen, then click on 'About'. On the 'About' screen you'll see the IP Address associated with your ATV2.
1C. After typing in the IP Address, click open on PuTTY, you'll get a window pop up that looks like this.
Note: There will be another window pop up that's titled 'PuTTY Security Alert', read it if you like, but I just clicked 'YES'
-For login type root, press enter.
-For password type alpine, press enter.
-For next command line that shows 'Apple-TV:- root# type echo "deb http: //apt.awkwardtv.org./" > /etc/apt/sources.list.d/awkwardtv.list, press enter.
-For next command line that shows 'Apple-TV:- root# type apt-get update, press enter.
-For next command line that shows 'Apple-TV:- root# type apt-get install com.nito.nitoTV, press enter.
-Then a command line shows up asking a [Y/N] option. Just type Y, press enter.
-Now finally for next command line that shows 'Apple-TV:- root# type killall Lowtide, press enter.
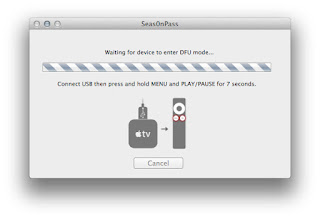
-Now you've completed the installation of nitoTV to your ATV2. For it to show up on the ATV2 menus, you'll have to re-boot the ATV2. Because I jailbreaked it on the new 4.4.4 software, it will be a tethered re-boot. To do so, to put the ATV2 to sleep, and unplug the HDMI cable. Then follow this tutorial for a tethered re-boot.
If successfully you will now have the nitoTV tab, as shown below:
Click HERE to learn how to install XBMC through nitoTV.
Thanks for reading, please leave a comment!


